Do you want to know how to connect Cloudways to your GoDaddy domain? I appreciate that you have purchased a suitable cloud server from the best hosting service to launch your dream website.
Even though Cloudways does not offer free domain name registration, its server service is worth using. I have been using their DigitalOcean and Vultr servers and am completely satisfied with the performance, support, and security features.
To connect Cloudways with Godaddy, you need to point your domain to the server by updating the DNS settings in GoDaddy and then adding it to Cloudways hosting. Let me guide this step-by-step process.
How To Point Godaddy Domain To Cloudways?
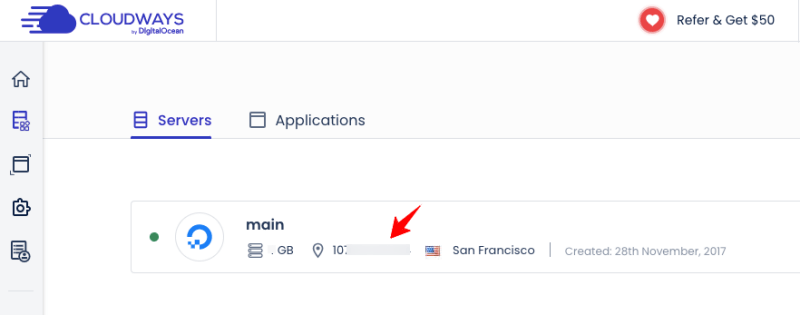
Step 1: Log in to your Cloudways account. Go to your “Servers” in the dashboard and copy the IP address. Refer to the below image for understanding.
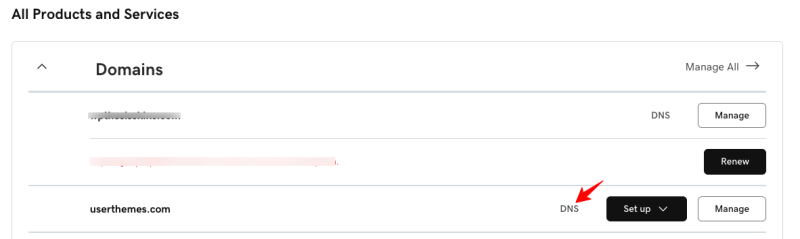
Step 2: Sign in to your GoDaddy account. Click the option “DNS“.
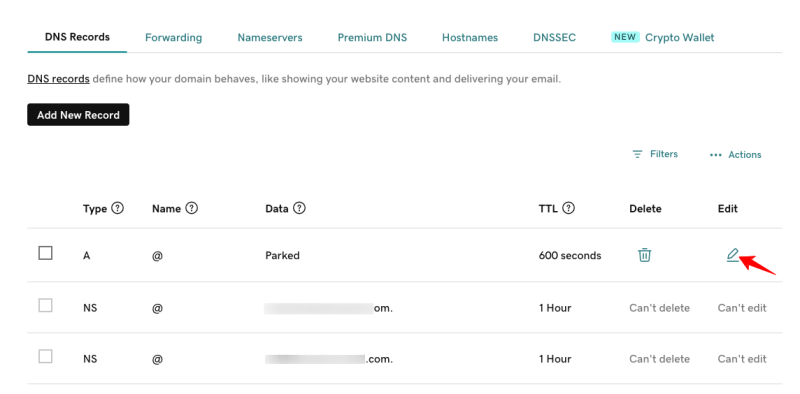
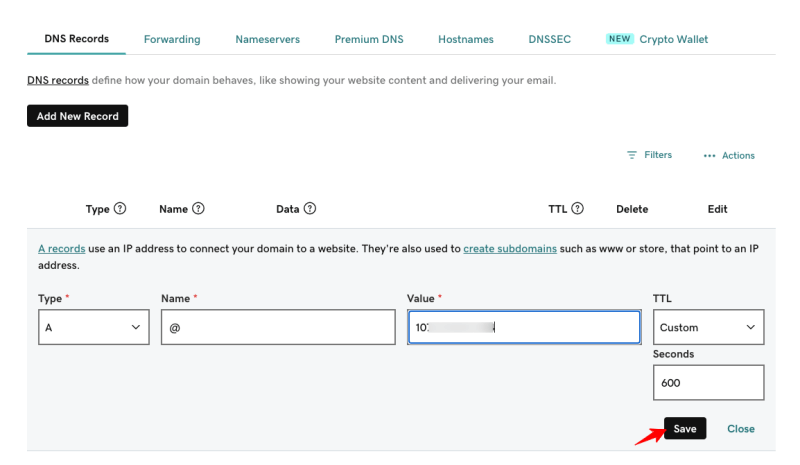
Step 3: Now, it will take you to the setup page, where you have to edit the “A” record. Look at the following screenshot to locate the “A” record. Hit its Pencil icon.
Step 4: Under the “Value” section, paste the IP address copied from your Cloudways account. Click the “Save” button.
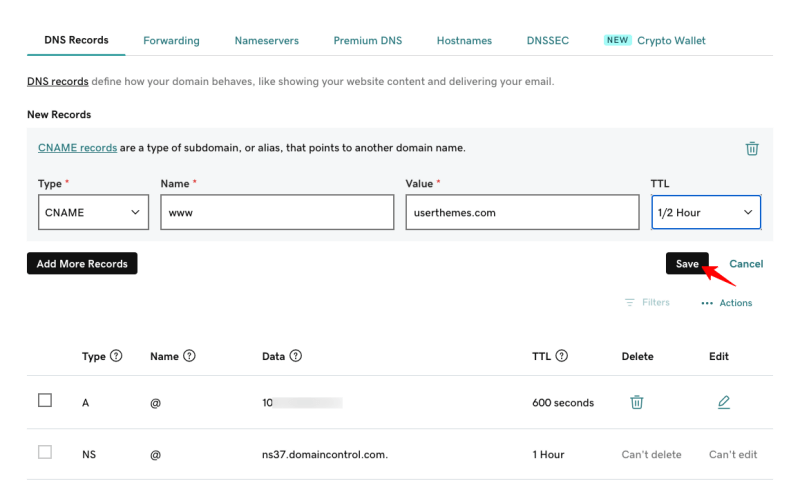
Step 5: After completing this step, click “Add New Record” and select the following details.
Type: CNAME, Name: WWW, Value: yoursitename.com(example: uesrthemes.com) TTL: default. Click the “Save” button.
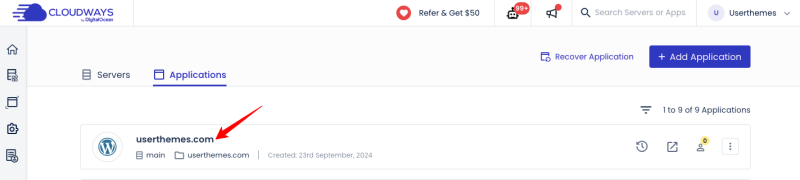
Step 6: Visit your Cloudways account > Applications; select your application. Check the image below!
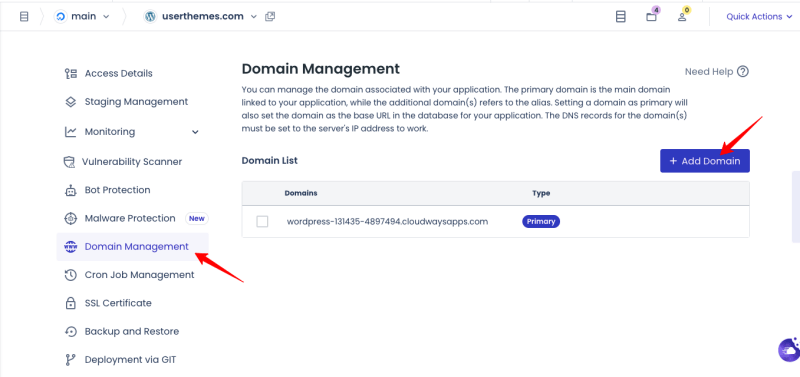
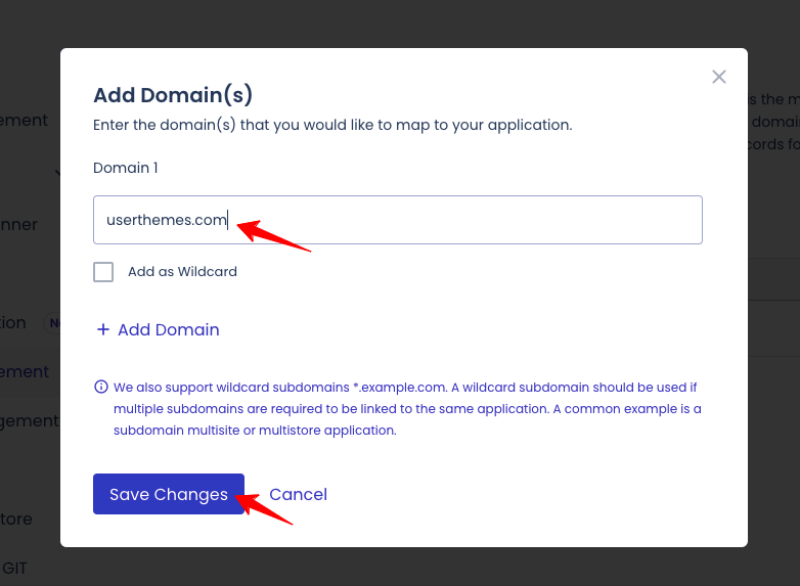
Step 7: Go to the “Domain Management” section and click the “Add Domain” button.
Step 8: A popup window will open where you need to enter your domain name. Don’t forget to hit the “Save Changes” button.
Step 9: Now you have successfully added your domain name. Now, click the 3 dots symbol and choose “Make Primary“. Refer to the below image for a clear understanding.
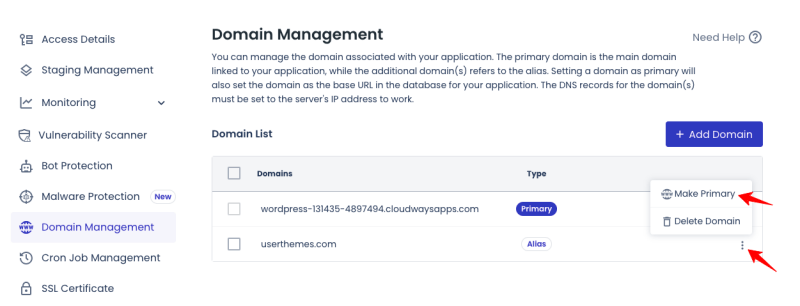
Step 10: A popup window will open; click the “Set As Primary” button.

Step 11: Now you have made this domain primary.

Note: The DNS propagation will take some time, like 24 – 48 hours. Once the records are updated, your GoDaddy domain will be pointed to the Cloudways account.
Wrapping Up
Cloudways is the ultimate hosting solution for scaling and managing your web applications. I would say that you have made the right choice for your business site. So, you have learned how to connect Cloudways to the Godaddy domain.
By the way, you have another option to complete this task in Cloudways. You may subscribe to their DNS Made Easy Addon to manage your DNS. It is a budget-friendly tool for instant DNS propagation and managing DNS records.
Other Cloudways Tutorials
How To Create Subdomain In Cloudways?